UV LED Curing for Heat-Sensitive Substrates: Best Practices
UV LED curing for heat sensitive substrates creates a critical advantage for manufacturers needing precise, high-speed production without thermal damage. Traditional mercury arc lamps often generate excessive infrared (IR) heat, causing warping, discoloration, or structural failure in delicate materials.
Switching to UV LED technology eliminates most of this thermal transfer. However, success requires more than just swapping lamps; it demands a strategic approach to wavelength, irradiance, and thermal management. This guide details the best practices for achieving a perfect cure on even the most fragile substrates.
Why Is UV LED Curing Superior for Heat-Sensitive Materials?
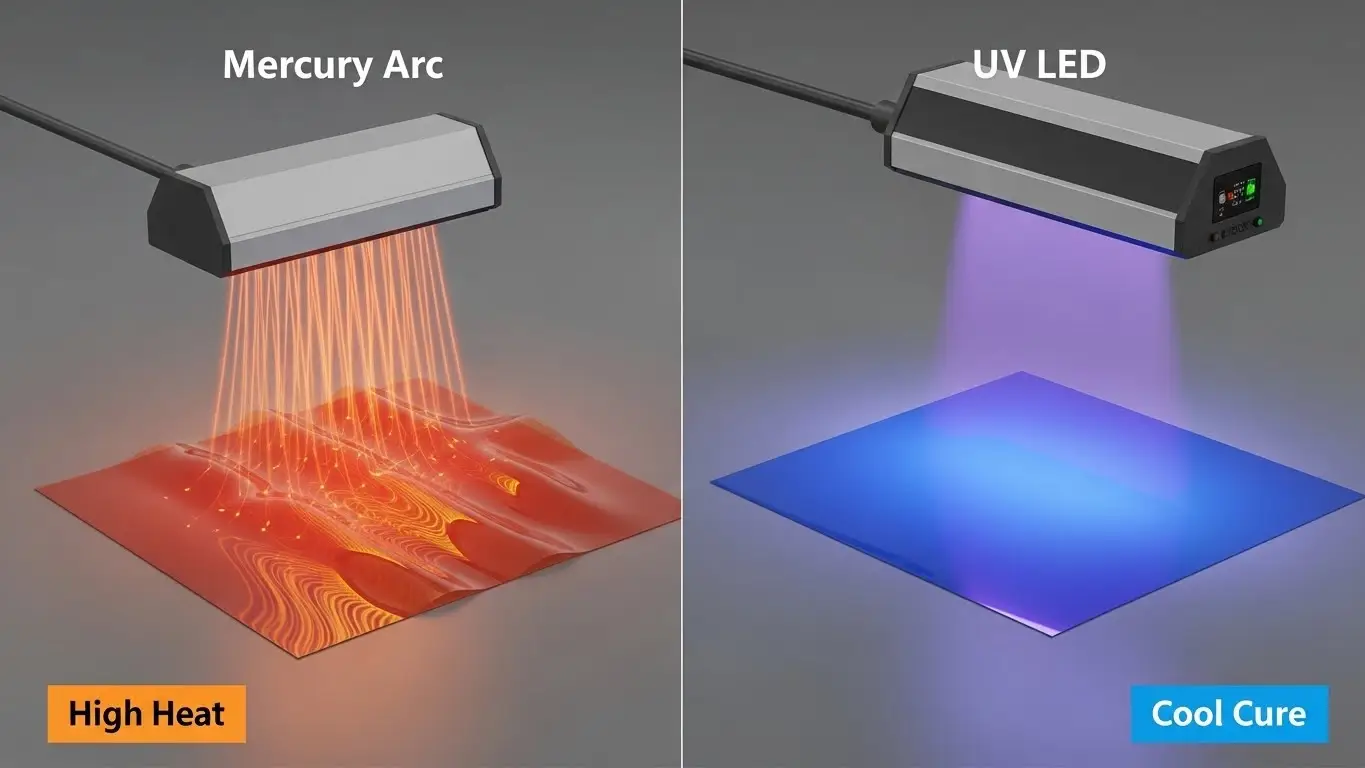
UV LED curing systems virtually eliminate infrared radiation, directing energy solely into the UV spectrum required for polymerization. This "cold curing" process prevents the surface temperature spikes common with mercury lamps, protecting delicate substrates like thin plastic films, thermal labels, and electronic components from distortion while ensuring immediate adhesion.
The "Cool Cure" Advantage Explained
In our experience at UVET, the most common failure mode for heat-sensitive applications is not chemical, but physical. When a 12-micron PET film passes under a mercury arc lamp, the intense IR bombardment heats the substrate faster than the coating can cure. The result? "Cockling" or wrinkling that ruins the roll.
UV LED curing overcomes this through spectral purity. A standard mercury lamp is a broadband emitter, spewing energy from 200nm deep UV all the way out into the visible and infrared spectrum. Roughly 60-70% of that energy is wasted as heat.
| Feature | Mercury Arc Lamp | UV LED System | Impact on Heat-Sensitive Substrate |
| Spectral Output | Broad (UV-A, B, C, Vis, IR) | Narrow (e.g., 365nm, 395nm) | LEDs emit zero IR, preventing direct thermal rise. |
| Standby Heat | Always Hot (Shutter required) | Instant On/Off | Substrates aren't baked during line stops. |
| Surface Temp | Can exceed 100°C (212°F) | Typically < 40°C (104°F) | Critical for low-melting-point plastics. |
| Cooling Needs | Heavy extraction/HVAC | Compact air or water cooling | Reduces facility ambient heat load. |
By using UV LED, you decouple the curing energy from the thermal load. This allows you to blast a coating with high peak irradiance (W/cm²) to drive the reaction without simultaneously roasting the carrier material.
Expert Insight: We often see "heat" confused with "irradiance." Even with LEDs, high energy can generate some heat due to the exothermic reaction of the chemistry itself. While the lamp is cool, the chemistry might warm up. This distinction is vital for ultra-sensitive electronics.
For a deeper dive into general coating applications, explore our guide on UV LED Curing for Coatings.
What Are the Main Challenges When Curing on Delicate Substrates?
The primary challenges include substrate deformation, incomplete through-cure due to oxygen inhibition, and adhesion failure caused by thermal expansion mismatches. Heat-sensitive materials often have high coefficients of thermal expansion, meaning they shift or stretch even with minor temperature changes, potentially shearing the curing coating before it bonds.
Curing on heat-sensitive substrates is a balancing act. You need enough energy to crosslink the polymer chains but not so much that you trigger the material's glass transition phase.
Common Failure Modes:
- Film Distortion (Warping/Curling): This occurs when the substrate expands while the coating shrinks during cure. On a 12-micron shrink sleeve, this looks like a permanent curl that disrupts downstream labeling machinery.
- Discoloration (Yellowing): Thermal paper and certain plastics (like PVC) will yellow instantly if the surface temperature exceeds their threshold. This is often irreversible and results in rejected batches.
- Incomplete Cure (Tacky Surface): To avoid heat, operators sometimes turn the power down too low. This leaves the surface tacky, a phenomenon known as oxygen inhibition. The UV energy wasn't sufficient to overcome the oxygen in the air, leaving a wet layer on top.
Strategies for Mitigation:
- Chill Rollers: Even with cool LED lights, using a water-cooled backing roller acts as a heat sink, pulling exothermic heat away from the substrate.
- Nitrogen Inerting: This removes oxygen from the cure zone, allowing you to use lower power (and thus less heat) to achieve a tack-free surface.
If you are struggling with surface tackiness, read our detailed analysis on What Causes Incomplete Cure in UV Coatings (And How to Fix It).
How Can You Optimize UV LED Settings for Thermal Management?
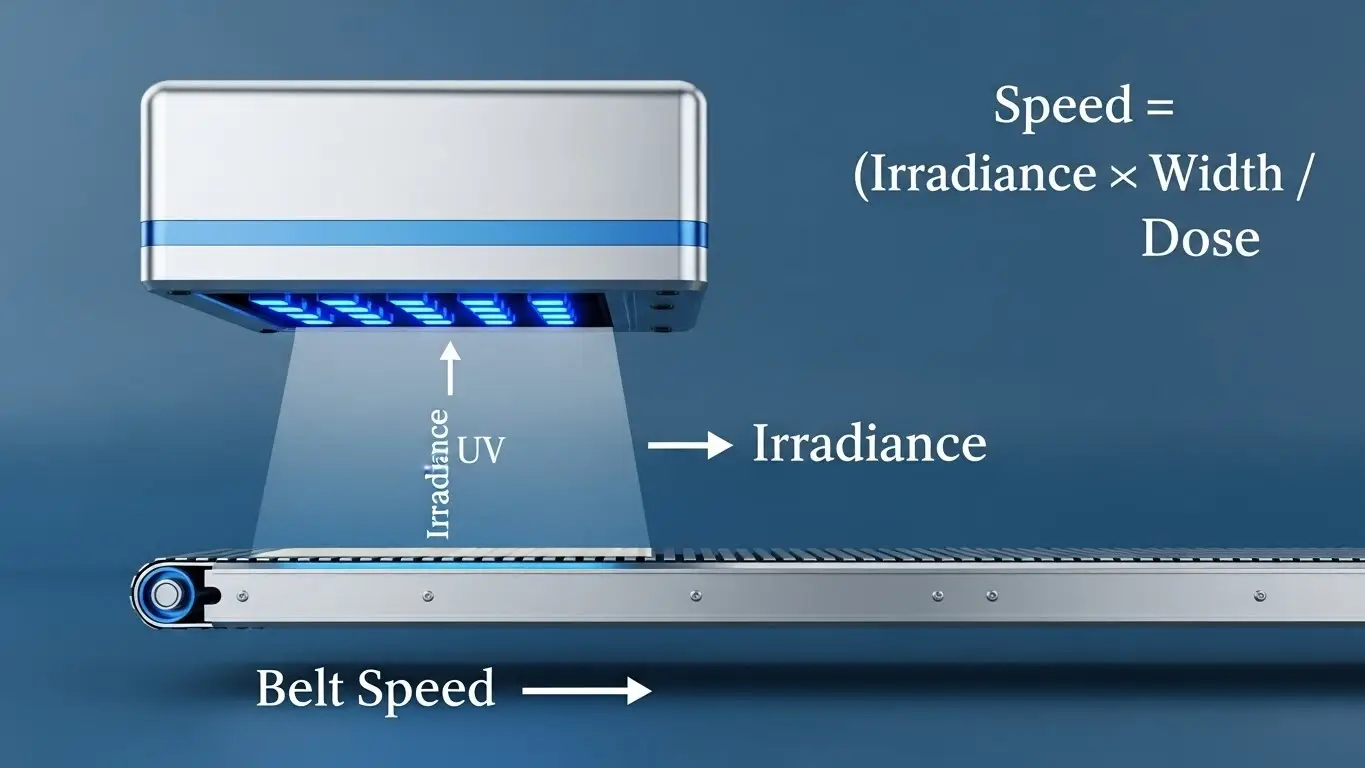
Optimization requires precise control of irradiance, exposure time, and working distance to maximize dose while minimizing thermal accumulation. Technicians should utilize Pulse Width Modulation (PWM) to dim LEDs rather than moving them further away, ensuring the peak intensity remains effective for penetration while reducing total thermal load.
Fine-Tuning Your UV Process Window
One specific anecdote from our lab involves a client trying to cure a conductive silver ink on a thin polyester circuit. They were blasting the part with 100% power at a slow speed, melting the circuit traces.
We adjusted the process using Dose Management instead of raw power.
Steps to Optimize Settings:
- Match Wavelength to Chemistry: Ensure your LED output (e.g., 395nm) matches the absorption peak of the photoinitiator in your ink. A mismatch forces you to run at higher power to get a cure, generating unnecessary heat.
- Adjust Duty Cycle (Pulsing): Some advanced UV LED controllers allow for pulsing. A 50% duty cycle turns the light on and off rapidly. The chemical reaction continues during the "off" phase, but the substrate has microseconds to dissipate heat.
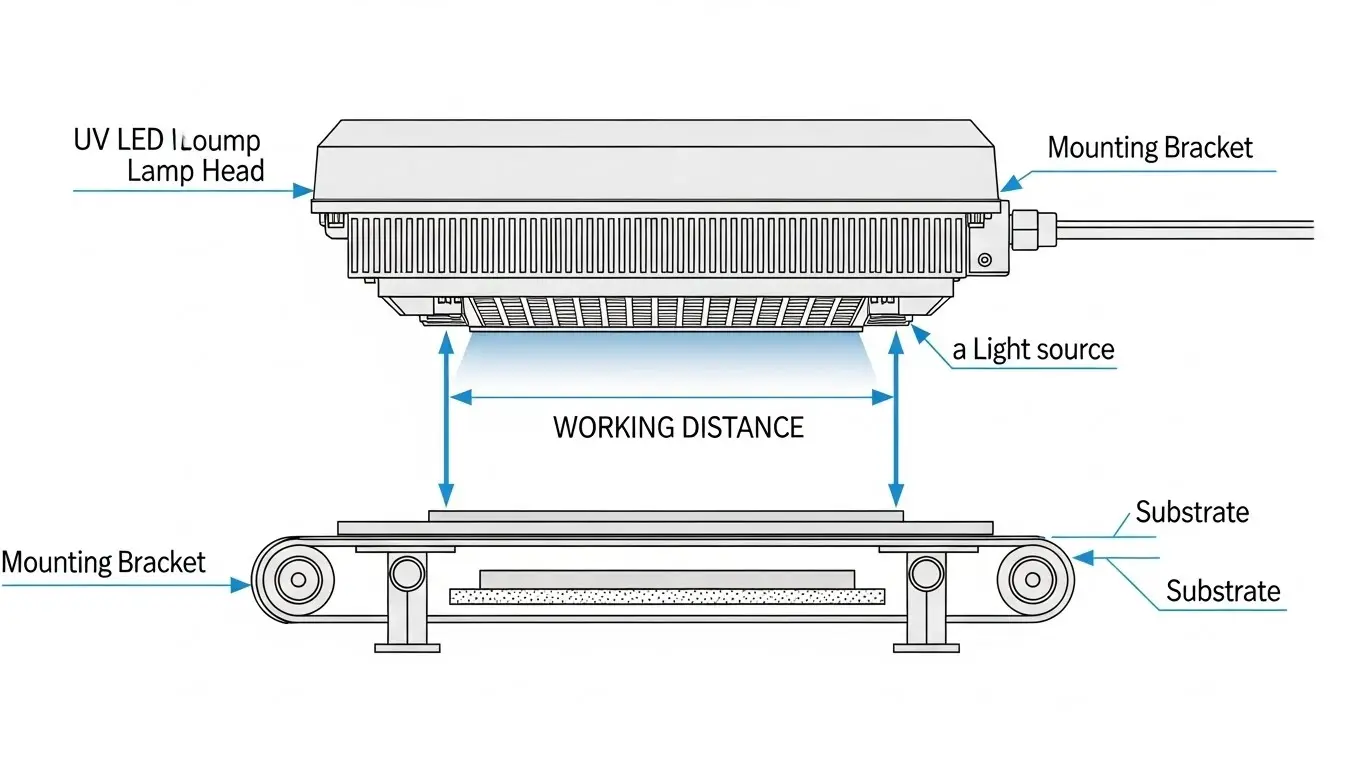
- Optimize Working Distance: LEDs are not collimated like lasers; the energy drops off quickly over distance. Keep the lamp head close (5-10mm) to ensure the energy penetrates the coating, but increase the line speed to reduce dwell time.
Thermal Management Checklist:
- Is the cooling system (air/water) for the LED head functioning at 100%?
- Are you using a reflector or shield to focus stray light?
- Have you measured the substrate temperature immediately after the cure zone?
For specific advice on thin films, refer to our resource: How to Cure Coatings on Plastic Film with UV LED.
Which Substrates Benefit Most from UV LED Technology?
Thermally sensitive films like BOPP, PE, PET, and shrink sleeves gain the most efficiency, followed closely by electronics components and thermal paper. These materials typically degrade or deform at temperatures above 60-80°C, making the low-temperature operation of UV LED curing the only viable high-speed solution.
Substrate Compatibility Breakdown
We have successfully implemented UV LED solutions across a wide map of materials. Here is a breakdown of where the technology shines:
Flexible Packaging Films (BOPP, PET, LDPE)
In the narrow web industry, unsupported films are notoriously difficult. Mercury lamps require massive chill drums to prevent the web from stretching. UV LED systems often allow converters to run unsupported film on standard presses without expensive thermal management upgrades.
Shrink Sleeves (PVC, PETG)
Shrink sleeves are designed to shrink when heated. If your curing system triggers this pre-maturely, the sleeve distorts before it is applied to the bottle. UV LED is the industry standard here because it creates zero pre-shrinkage.
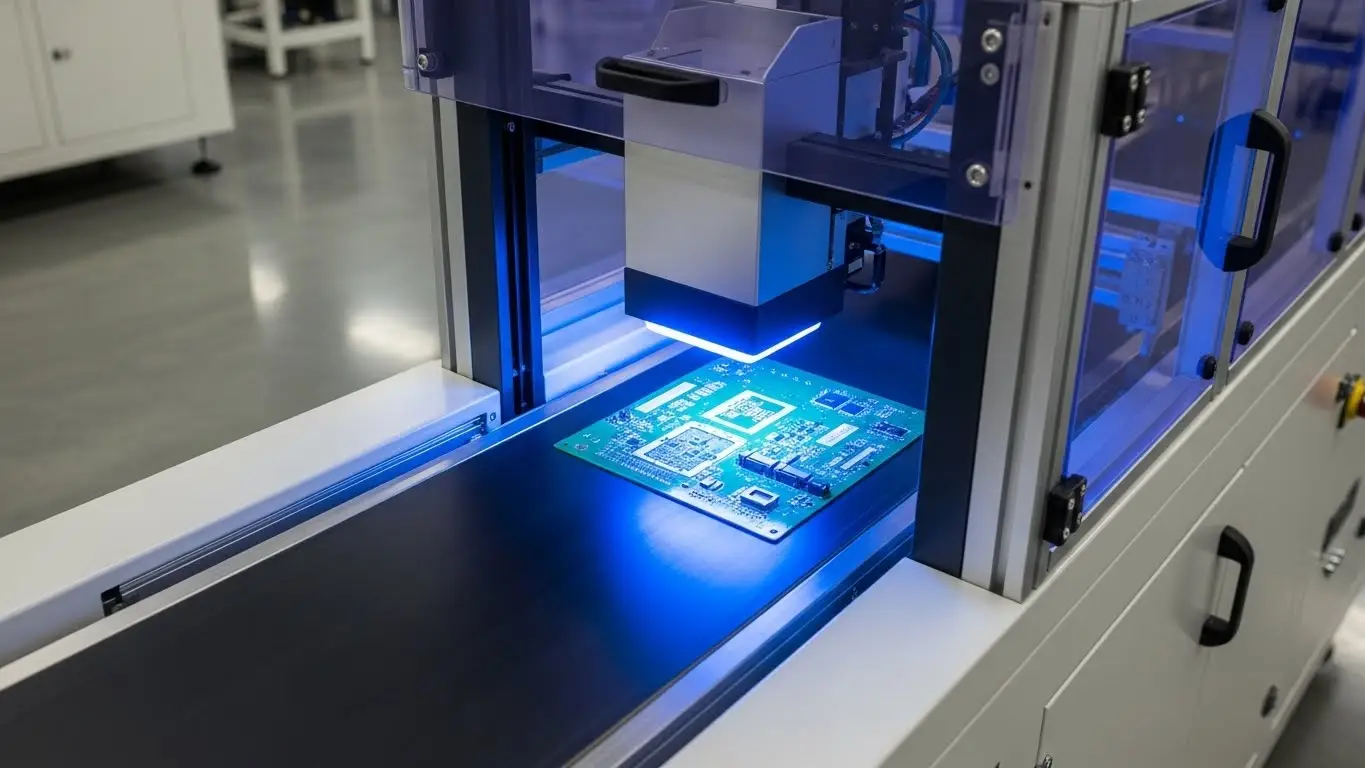
Electronic Components
Curing conformal coatings on PCBs or potting compounds requires care. Heat can damage sensitive chips or reflow solder joints. UV LED "Spot Curing" is massive here, allowing precision curing of adhesive dots without heating the surrounding board.
Thermal Paper
Used in logistics labels and tickets, this paper turns black if heated. UV LED allows for protective top-coating of variable data labels without ruining the printed code.
| Substrate | Max Temp (Approx) | Mercury Risk | UV LED Benefit |
| PVC (Shrink) | 60°C | High | Zero premature shrinkage |
| Thermal Paper | 70°C | Extreme (Blackening) | Safe top-coating |
| BOPP | 80°C | Moderate (Stretching) | Improved registration |
| Polycarbonate | 120°C | Low | Faster cycling/throughput |
While typically associated with liquid coatings, some ask about solids. See our investigation: Can UV LED Cure Powder Coating?.
How Do You Test Cure Quality on Delicate Substrates?
Testing on delicate substrates requires non-destructive methods like surface tack checks and dyne testing, alongside standard destructive adhesion tests. You must verify that the lack of heat didn't result in an "under-cure," where the bottom layer of the coating remains liquid despite a hard outer shell.
Validating the Process
Because we are aggressively managing heat, we often skirt the edge of the "minimum dose" required for cure. Rigorous testing is non-negotiable.
Essential Quality Tests:
- The Thumb Twist Test (Subjective): Press your thumb firmly onto the cured surface and twist. If the surface mars or feels tacky, the surface cure is incomplete. This is the first line of defense.
- Solvent Rub Test (MEK Rub): Rub a cloth soaked in Methyl Ethyl Ketone (MEK) across the surface. Count the "double rubs" until the coating breaks down. Note: Ensure the solvent itself doesn't eat your delicate plastic substrate!
- Cross-Hatch Adhesion (ISO 2409): Cut a grid into the coating and apply pressure-sensitive tape. Rip it off. If the coating lifts, it may be under-cured at the base (interface failure).
- Dyne Testing: For films, surface energy is key. A dyne pen test confirms if the cured coating has the correct surface tension for subsequent printing or laminating layers.
The "Through-Cure" Trap:
On heat-sensitive materials, we often see "skin curing." The LED blasts the top, curing it instantly, but the light doesn't penetrate to the bottom. The heat from a mercury lamp used to help "bake" this lower layer. With LED, you must ensure your wavelength (e.g., 395nm) has enough penetration power to reach the substrate interface.
For a full protocol on verification, verify your methods with: How to Test UV Coating Cure Quality (Adhesion, Rub, Tack).
Conclusion: Mastering the Cool Cure
UV LED curing for heat-sensitive substrates is not just a trend; it is a manufacturing necessity for modern, high-speed production of films, electronics, and labels. By eliminating the infrared heat burden, you unlock higher yield rates, lower energy costs, and the ability to process thinner, cheaper materials.
However, the "cool" nature of LED requires you to be smarter about your chemistry and your process controls. You must trade the brute force of heat for the precision of irradiance and wavelength matching.
Key Takeaways:
- Switch to LED to eliminate IR and prevent warping.
- Match your ink chemistry to your LED wavelength (365/385/395/405nm).
- Manage the "Dark Cure": Ensure adhesion is achieved at the substrate level, not just the surface.
- Test aggressively using rub, adhesion, and dyne tests to confirm process stability.
At UVET, we specialize in these precision applications. Whether you are retrofitting a flexo press for shrink sleeves or designing a new electronics assembly line, our "cold curing" solutions are built to protect your product while maximizing your throughput.
Would you like me to develop a specific case study section regarding a particular heat-sensitive material, such as thermal labels or shrink sleeves, to add more depth to this guide?
Share on Social:


