How UV LED Curing Works: A Simple Step-by-Step Explanation

You might wonder how uv led curing work in a fast-paced industrial environment to turn liquid coatings into solid finishes in a split second. This process is a high-speed, controlled method that relies on specific light energy to trigger a chemical bond. By following a clear path from application to final hardening, you can see how this technology improves your output. In this guide, you will learn the exact steps involved in the process, the tools you need, and why this method is becoming the standard for modern assembly and printing lines.
Understanding UV LED curing technology helps you manage your production with better precision. You can move away from old drying methods that rely on heat or air. Instead, you use a process that is predictable, cool, and nearly instant. As you read through these steps, you will gain a clear picture of how light energy changes the physical state of your materials to create a tough, durable surface.
What Is UV LED Curing?
UV LED curing is a process where ultraviolet light from diodes causes inks, coatings, and adhesives to harden instantly. You use this method to create a chemical bond rather than waiting for liquids to evaporate. It differs from heat-based drying because it stays cool and works in seconds, making it ideal for your heat-sensitive products.
When you look at your shop floor, you likely see many materials that need a finish. UV LED curing works on items like labels, plastic films, and electronic parts. Unlike thermal drying, which uses huge ovens to bake out water or solvents, this method uses a cold light source. You avoid the risk of your materials melting or warping because the energy is focused only on the surface coating.
You can apply this to several types of resins and inks. These materials are specially made to react only to specific light wavelengths. This means your coating stays liquid until you want it to set. Once your product passes under the light, the transformation is complete. You get a dry, finished product that you can pack or ship right away. This control over the timing of the cure is a big advantage for your workflow.
What Equipment Is Used in UV LED Curing?
The equipment for this process includes a UV LED lamp head, a power control unit, a cooling system, and the mounting gear to fit it to your line. These parts work as a single unit to give your product a steady dose of light. You need all these pieces to ensure your cure is consistent and your gear stays in good shape.
Your UV LED curing systems start with the lamp head. This box contains arrays of small diodes that emit the UV light. To keep these diodes running for 20,000 hours, you need a cooling system. You can choose air-cooled fans or water-cooled chillers. Air is easier to set up, but water cooling allows for a smaller lamp head in tight spaces.
The power and control unit is the brain of your setup. It lets you turn the light on and off or change the brightness. You can link this unit to your conveyor belt so the UV LED curing equipment only fires when a product is present. Using a high-quality UV LED curing light ensures that the light spreads evenly across your entire product, leaving no soft spots or wet edges behind.
Step-by-Step: How UV LED Curing Works
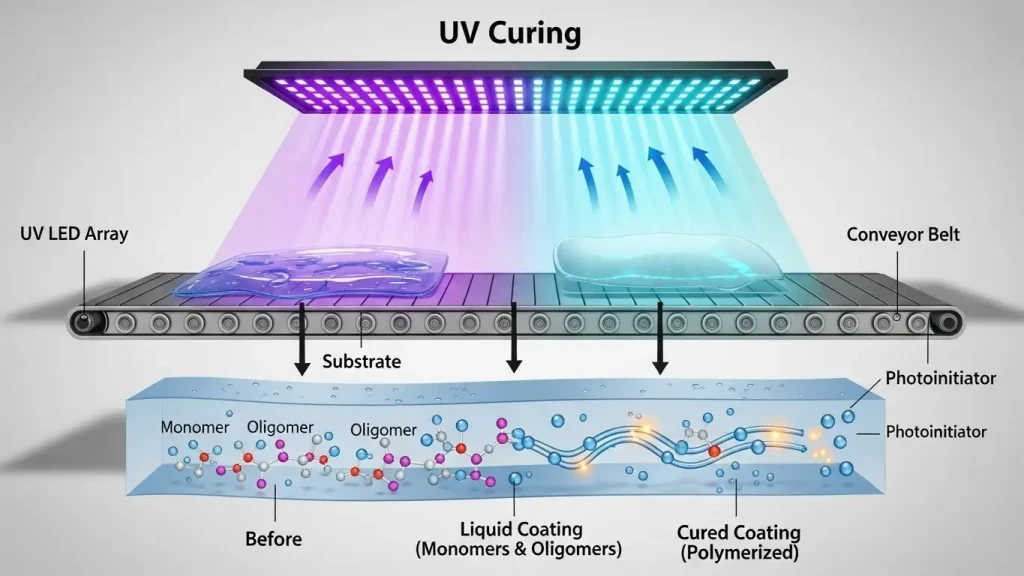
The UV LED curing process follows five distinct steps to turn liquid material into a hard surface. You start with the application of the material, followed by exposure to specific light wavelengths. This triggers the photoinitiators to bond the molecules together into a solid film. The result is a finished part that you can handle immediately.
Step 1 – Application of UV-Curable Material
You begin by applying your ink, coating, or adhesive to your substrate. This could be done through a printing press, a spray nozzle, or a needle dispenser. The material you use must be "UV-curable," meaning it contains special ingredients called photoinitiators. These particles are dormant until they meet UV light. Your coating stays wet and workable during this stage, which gives you time to ensure it is applied perfectly.
Step 2 – Exposure to UV LED Light
Next, your product moves under the UV LED lamp head. The lamp emits a very narrow band of light, such as 365nm or 395nm. This light is highly concentrated and points directly at your coating. Because you have control over the lamp settings, you can ensure the light hits every part of the surface at the same intensity. This step happens in a fraction of a second as your line moves.
Step 3 – Activation of Photoinitiators
As soon as the light hits your coating, the photoinitiators absorb the UV energy. They act like a match that starts a fire. These particles break apart and become active, looking for other molecules to grab. This is the start of the chemical change. You do not see this happen with your eyes, but it is the most critical part of the UV LED curing process because it sets the bond.
Step 4 – Polymerization and Curing
The active photoinitiators force the liquid molecules, called monomers, to link together. They form long, tough chains called polymers. This is why the process is often called polymerization. Your material turns from a liquid into a hard, cross-linked solid. This bond is very strong and resists chemicals, scratches, and water. The cure happens all the way through the layer, not just on the top.
Step 5 – Instant Handling or Further Processing
By the time your product leaves the light zone, it is fully dry and hard. You do not need to wait for it to cool down or air-dry in a rack. You can stack your labels, roll up your film, or install your parts into a larger machine right away. This removes a major delay from your production and helps you ship your orders much faster.
Why Is UV LED Curing So Fast and Efficient?
UV LED curing is fast because it uses high-intensity light that reacts with materials in less than a second. You also get better yield because the systems turn on and off instantly, with no warm-up time required. Since the light is focused on a narrow wavelength, you spend less energy on heat and more on hardening your product.
When you look at your energy bills, you will see UV LED curing benefits almost immediately. Traditional lamps stay on all day because they take 20 minutes to warm up. Your LED system is ready the moment you push the button. This means you only use power when a product is actually on the line.
The focused light also means you do not waste energy. Old lamps produce a lot of infrared light, which is just heat you do not need. LEDs produce only the UV light that triggers the cure. This keeps your shop cooler and protects your products. You can run your line at higher speeds because the light is so concentrated, which helps you produce more parts in every shift.
| Feature | LED Curing | Traditional Drying |
| Speed | 1 Second or less | Minutes to Hours |
| Heat | Minimal | Very High |
| Warm-up | None | 15-20 Minutes |
| Yield | High (Less waste) | Low (Evaporation/Warping) |
How Does UV LED Curing Compare to Mercury UV Curing?
UV LED curing differs from mercury UV curing by providing a cooler process and a much longer lamp life. Mercury lamps produce broad-spectrum light and ozone gas, which requires you to install large exhaust fans. LEDs are more focused and contain no toxic mercury, making them safer and easier for you to maintain over time.
In the UV LED vs mercury UV curing debate, maintenance is a major factor for your team. Mercury bulbs burn out every 1,000 to 2,000 hours. They also lose their power slowly, so you might not notice when your cure starts to fail. Your LEDs stay at the same power level for up to 30,000 hours. You avoid the cost of buying new bulbs and the downtime of changing them.
The safety of your shop is also improved. Mercury lamps are made of glass and filled with toxic material. If one breaks, you have a dangerous mess. LEDs are solid-state devices with no mercury and no glass to shatter. You also stop producing ozone, which is better for the air your workers breathe. You get a cleaner, safer, and more reliable production environment.
Where Is This Curing Process Commonly Used?
You can find the UV LED curing process in high-speed printing, electronics assembly, medical tool manufacturing, and industrial coatings. Any place where you need a fast bond or a tough finish on a mass scale is a great fit for this tech. It works well in cleanrooms and small shops alike because of its compact size.
Printing and Packaging
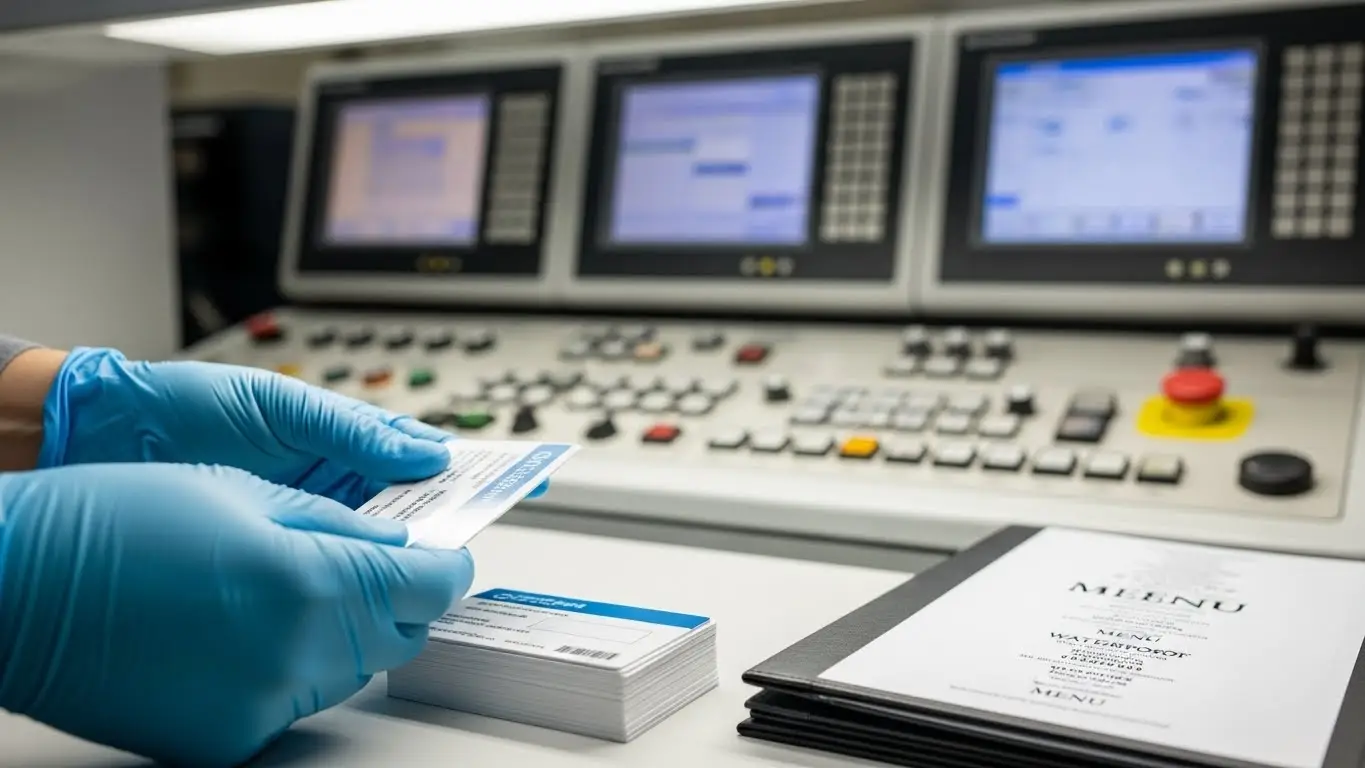
If you run a print shop, UV LED curing applications allow you to print on plastic labels and shrink sleeves without melting them. You can also print on metal or glass. Since the ink dries instantly, you can run your press at full speed and ship the product the same day.
Electronics Manufacturing
When you build circuit boards, you use UV LED to set protective coatings or bond chips. The low heat protects your sensitive electronic parts from damage. You get a precise cure that only hits the parts of the board you choose, which is vital for complex devices.
Medical Devices
For medical gear like syringes or hearing aids, the bond must be strong and clean. You can use these systems to glue plastic and metal parts together with high reliability. The cold light keeps your plastic parts from changing shape, ensuring a perfect fit every time.
What Safety Practices Are Important During UV LED Curing?
Safety during UV LED curing involves protecting your eyes and skin from the light and using shields to keep the light contained. While these systems do not produce ozone, the UV energy is very strong and can cause burns if you are exposed to it. Proper training and gear are essential for your team.
You should always use light shields around your lamp head. These are usually metal or dark plastic boxes that prevent light from shining into the rest of the room. If your workers must look at the process, they need UV-rated safety glasses. You should also ensure that your UV LED curing safety plan includes signs to warn people when the lamps are on.
Keeping your gear clean is also a safety step. If dust builds up on the lamp optics, the system might overheat. Regular checks of your cooling fans or water lines will keep the system running safely. Because there is no mercury, you do not need special hazardous waste plans, which makes your daily safety checks much simpler.
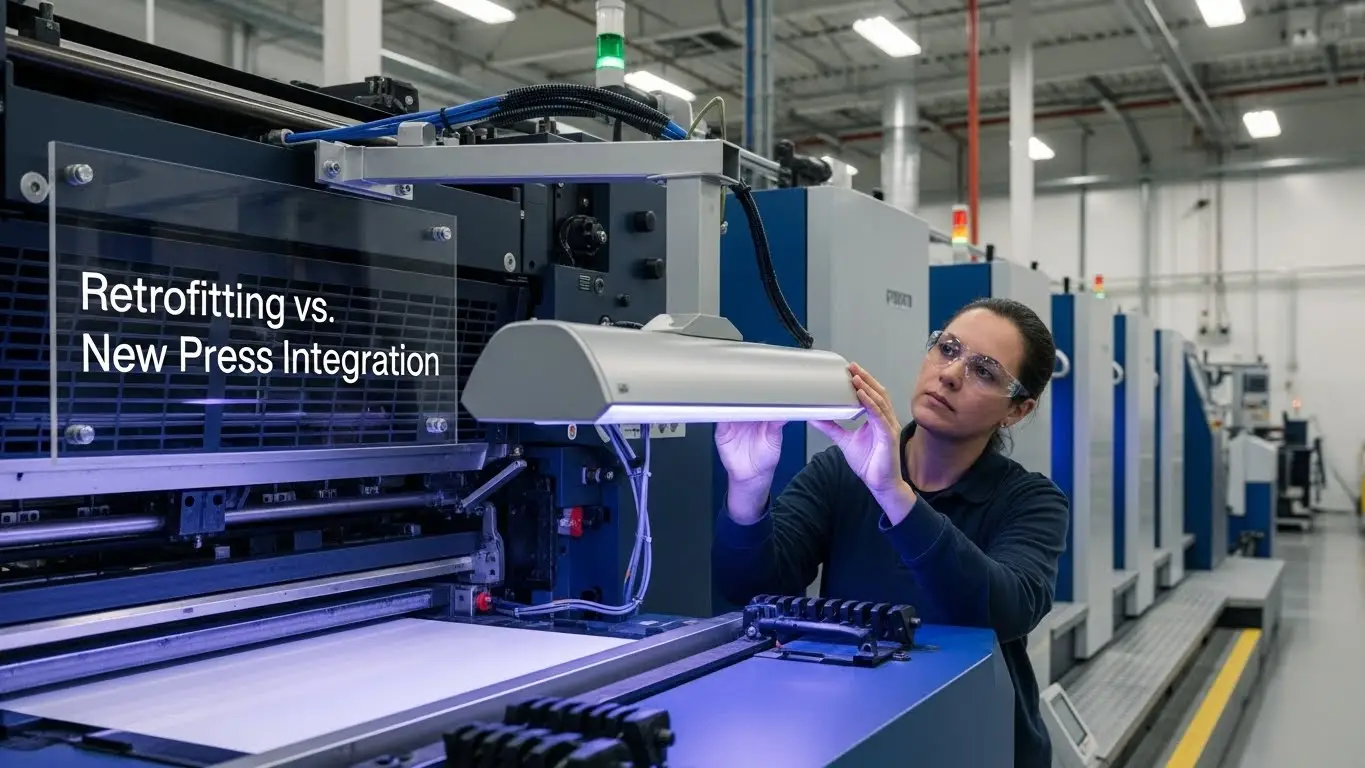
How Do You Choose the Right UV LED Curing Setup?
To choose a UV LED curing system, you must match the wavelength of the light to the requirements of your ink or adhesive. You also need to look at your line speed and how much space you have for the lamps. Talking to your material supplier is the best way to ensure your light and coating work together.
Most industrial coatings need a wavelength of 365nm, 385nm, or 395nm. If you pick the wrong one, your material will stay sticky. You also need to check the "irradiance," which is the power of the light at a certain distance. If your conveyor is very fast, you need more power to cure the material in a shorter time.
Think about your shop's utilities. If you have plenty of room, an air-cooled system is easy to install. If you are fitting a lamp into a small space inside a printing press, a water-cooled system might be your only choice. By looking at your total costs, including power use and the lack of bulb changes, you can find a setup that saves you money over the long term.
Final Thoughts
The UV LED curing process is a breakthrough for your production because it removes the heat and delays of old drying methods. By following the simple steps from application to instant handling, you can see how much faster your shop can run. You get a tougher product, a safer workplace, and a much more reliable way to finish your goods.
As you look at your next equipment purchase, think about the time you lose to drying and maintenance. A move to LED technology can help you grow your business by letting you handle more jobs in less time. With the right light and a well-matched coating, you can achieve a perfect finish on every part that leaves your line.
FAQ on How UV LED Curing Works
How long does the cure take?
In most cases, the cure happens in less than one second. As soon as your product passes under the UV LED lamp, the light energy completes the bond. This is why you can run your production lines at such high speeds compared to older methods.
Do I need special inks for LED curing?
Yes, you need inks or adhesives that are made to react with the specific wavelength of your LEDs. Traditional inks are often made for mercury lamps and might not cure correctly under an LED light. Always check with your supplier to match your material to your light.
Can I touch the product right after it is cured?
Yes, your product is fully dry and hard as soon as it leaves the light zone. There is no "tack" or stickiness, and you do not need to wait for it to cool down. You can stack, roll, or ship the items immediately.
Does UV LED curing work on wood or metal?
Yes, it works on almost any substrate, including wood, metal, glass, and plastic. The key is the coating you apply to that surface. As long as the coating is UV-curable, the LED light will harden it into a durable finish regardless of the material underneath.
Is the bond as strong as traditional drying?
The bond is often stronger. Because the polymerization creates cross-linked chains throughout the material, the finish is very resistant to chemicals, moisture, and wear. It creates a high-quality surface that is built to last.
Why is there no ozone with LED?
Ozone is created when high-energy broad-spectrum light reacts with oxygen. LEDs emit a very narrow, lower-energy band of light that does not have enough power to create ozone. This makes your workplace safer and removes the need for big exhaust vents.


